Hello and welcome to The Daring Cardmakers blog! We are a team of card-makers from the UK, mainland Europe and India who'll try to inspire and encourage you to make some wonderful cards. Every Friday at about 10am UK time, one of our design team will post a new dare/challenge, along with our creations to get you inspired. So go on, give it a try - we dare you! Leave us a comment with a link to your card so that we can view your lovely creations too!
Wednesday, August 27, 2008
Piping Hot !!
Hope you lot over there in the UK and Europe are having a few days of sunshine - whilst us poor souls in NZ are still in the depths of winter!
You all seem to be enjoying our 'new look' mid week dares, and we are loving all your new creations! Thank you so much to everyone who participates we really do appreciate your contributions. :)
Now, it's my turn this week to set the dare and I want you to use PIPE CLEANERS!! Any shape, colour or form - put them on a card! I know it can be difficult to incorporate Pipe Cleaners on cards (sticking them down is one obstacle!) but they can be put to lots of interesting uses too! So go on - it wouldn't be a challenge site if it was easy would it?
Here are some of the design teams' cards to hopefully inspire you - and don't forget to leave us a link to your cards so that we can come have a nosey at your fab creations!
Happy piping!
thanks again, Jane :)
Keryn
Monday, August 25, 2008
A Side Order with that....
After Mels Quick cards sometimes we need a little something to go with a card - you know just a little something, so my challenge to you all is to make a card and something to go with it - even if its just an extra special envelope.
I had a couple of ideas I wanted to share with you with some brief instructions.
A windmill - we all love them - really simple square of patterned paper with diagonal cuts then folding alternate corners over onto a stem. I rescued an ugly unloved promo one and recycled the base! The centre circle was stamped on patterned paper to hold everthing in place.
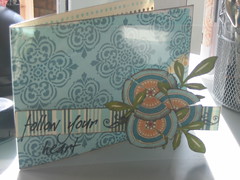
A notebook - again patterned paper and a piece of ribbon and a stamped square and handwritten title
An envelope - easy peasy with a template, if you don't have one cut open an ordinary one and use that.
A bookmark tag - just using up scraps.......
A bag-a-lope decorated with a card front.... a bag made from an A4 envelope.
Or just alter a little container for a few sweeties to lighten the day!
I don't mind what you have a go with but I thought we would venture outside our comfort zones - just a little. Can't wait to see what you all come up with!!
Thursday, August 21, 2008
This Way
OK, this week it's Tanya's turn to set the dare and this time it's a dare with a POINT! A nice sharp point, at that!
LythanSueRein
Kathy
Jozza
Vanessa
Tanya LeighNicky
Tuesday, August 19, 2008
Little Extra - Easy Peasy Happy Birthday
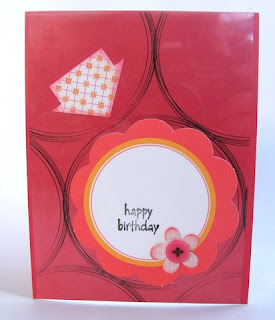
It's Mel here for a fun, little extra dare :) This one is Easy Peasy Happy Birthday Cards. You know the times when you've suddenly realised that you need a card and there is only enough time left to create something fast and simple (because you've left it until the last minute to start).
Well...the mid week little extra is just for you - create something fast and cute in advance so you aren't caught off guard with those last minute birthday cards ever again :))
Another quick idea is to print (or type/stamp) your birthday message, cut into strips and adhere on the card. Add a small embellishment under the message for a nice finishing touch.
Using transparencies for the background of your card makes a very speedy card. Add a die-cut, hand stamped message and small embellishment to complete the look. You can hide the adhesive (used for holding the transparency in place) behind your die-cut.
Friday, August 15, 2008
Its a Wrap
Ok, on with this weeks dare.
No, not the kind stuffed with Chicken & Cesar Salad or the woolly kind you put around your shoulders to keep you warm, mind you, the way our summer is going I think we could all do with one of those!
I would like you to give your card a coat made of acetate, vellum or anything for that matter.
As long as it ‘wraps’ around the outside of your card, anything goes!
VanessaRachel SueRhi
Lythan
Jozza
Kathy
Rein
Nicky
Tanya Leigh
Friday, August 08, 2008
Scrumdiddlyumptious
This week it's Rachel's turn to set our challenge and as it's Summer (or supposed to be...) in this part of the world her dare has a Summery theme
Tuesday, August 05, 2008
New look little extra!
I decided to have a go at three different uses of acrylic paint on my cards. I am by no means an expert on using acrylic paint (as you will see! lol) and to be honest, the reason I chose this was to actually use the paint dabbers that have been lingering in the bottom of my stash pile for quite some time.....
Sooooo...onto card 1.
This one is my favourite of the 3 that I made. I started out with a lovely sheet of paper (My Mind's Eye - Bohemia - Bella "mother" bird) and I picked out 2 colours of acrylic paint (in the end I only used 1 - eggplant)
I watered the acrylic paint down and applied it to a white square card blank in side to side strokes. You don't need anything posh to water the paint down - I just splodge some on the plastic cover of an ink pad and add water with my brush until I'm happy with it. For the effect I was after (purple sky) I added more water as I went down the page. It's a great feeling painting a background 'cos (sshh don't tell my kids!) I LOVE getting messy :o)
Once you've finished painting you need to let the card dry. Acrylic paint tends to dry fairly quickly as it's water based. The card will probably warp a little as it's drying but it's easy to bend it back into shape as it dries.
Once the paint dried I couldn't resist a little doodly border :o)
Next stage is the fiddly cutting out part. I kind of like that too. I do like fiddly finnicky jobs!
Here is the finished card. I stamped a Paperartsy stamp on the top left corner, first in white ink, then in black.
Here are a couple more cards using acrylic paint...
Card 2
I took a chipboard frame and painted it with gold acrylic paint. It's a great way to highlight a simple image on your card. A bit of doodling and the addition of some Bazzill rub ons & rhinestones make it a quick and easy card.
And lastly, card 3
Try copying a stamp design onto your card. I copied a swirl from an Autumn Leaves set (Mindy's Flowers). It doesn't have to be too accurate. Sometimes I like it if a card isn't too polished and perfect.
Using acrylic paint (I used white) go over the pencil drawing. This is where you learn (in my case anyway) that you need to invest in a decent set of brushes. My brushes are rubbish for painting swirls! I found I needed to water the paint down a fair bit for this. Once dry, stamp over the painted swirl in black ink.
Add some bits and pieces to "tart" up your card and voila!
The paper used on this card is Basic Grey periphery (Vineyard). Buttons, ribbon and brad are from my stash.
I do hope you've enjoyed this little extra. You may not have learned anything groundbreaking (except that I can waffle on!) but I hope it's made you want to play with paint a little bit.
We'd all love to see what you make if you do decide to have a go so please post a comment and link if you do.
Thanks for looking
Jozza xxx